I have used Postman for API tests for a long time. It’s a great tool. However, now it’s an entire API platform with too many features.
I don’t need all of its features, so I was looking for something light and fast. I found the Rest Client extension for VS Code, which amazed me with its simplicity.
As a fan of the Rest Client extension, I was happy to see that Visual Studio and Rider started supporting the .http or .rest files.
Getting Started
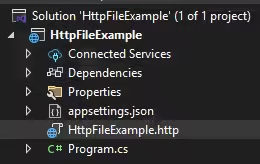
ASP.NET Core Web API project template now includes the .http file for your requests.

Note: All examples above will be in Visual Studio. However, you write requests the same way in VS Code or Rider.
If you don’t have the .http file or want to add more files, add the file with .http or .rest extension.
Writing Requests
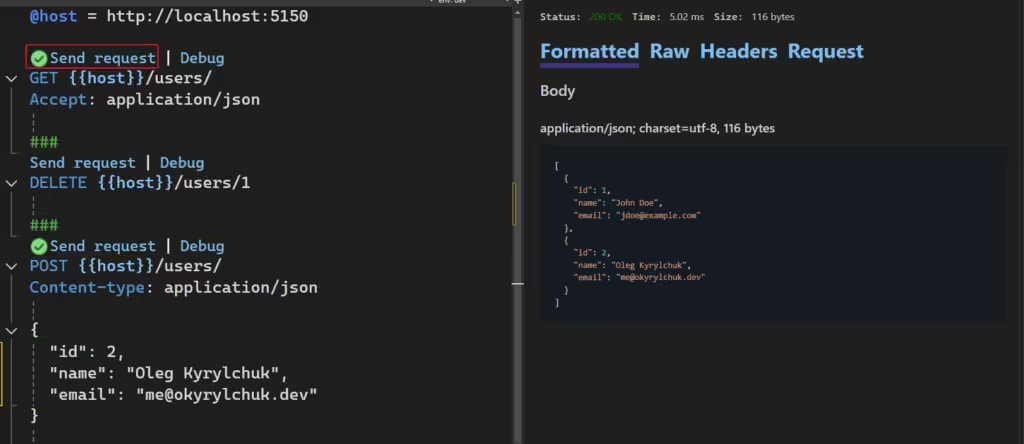
To create a request, start with the HTTP verb and put the URL afterward. After adding the request, the link “Send Request” will appear above each request. That’s it.
@host = http://localhost:5150

GET {{host}}/users/
Accept: application/json
As you can see above, it’s a GET request to fetch Users. It contains one HTTP header Accept: application/json.
Add each header on its own line immediately after the request line to add one or more headers. Don’t include blank lines between the request line and the first header or subsequent header lines.
Don’t worry that you must remember all headers, IntelliSence will help you.
You can also create variables and use them in the URL, headers, or parameters. The @host variable is visible in the example above. You can reference the variable value in the entire file using double curly braces.
A file can contain multiple requests by using lines with ### as delimiters.
@host = http://localhost:5150

GET {{host}}/users/
Accept: application/json

###
DELETE {{host}}/users/1
The request body must be after a blank line.
###
POST {{host}}/users/
Content-type: application/json

{
  "id": 1,
  "name": "John Doe",
  "email": "jdoe@example.com"
}
Sending Requests
Click the “Send Request” link above each request to send it. You’ll see the window with the response.

Environment Files
You can assign different values for your variables depending on the environment. To do that, create a http-client.env.json file in the same folder as the request .http file.
Then, you can set values for different environments:
{
  "dev": {
    "host": "http://localhost:5150"
  },
  "remote": {
    "host": "https://contoso.com"
  }
}
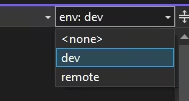
Then, you’ll see the environments in the top right corner:

Key Advantages
Lightweight & Integrated
- No need for external tools like Postman or cURL.
- Works directly inside your IDE (VS Code, Visual Studio, Rider).
Version Control Friendly
- .http files can be committed to Git, making API requests shareable across teams.
- Easier to track changes and maintain API request history.
Quick & Readable Syntax
- Simple and human-readable format compared to JSON or XML-based configurations.
- No need to learn a new scripting language or DSL.

